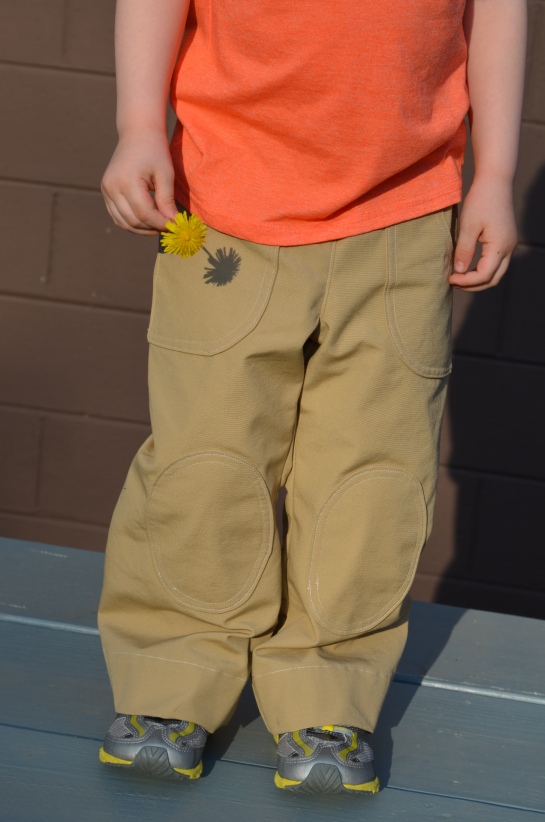
I was pretty much tapped by Thursday after the few sewing flops that I had with the navy pants and running out of thread on the three tees.  But I bought the Parsley Pants Pattern on Friday, bought fabric for them on Saturday, sewed them up on Sunday, and finally got some pics on Monday.  And you can also see the Tyrone shirt in action.  (That’s a flashback skinny tee in case you don’t feel like clicking over to the post to find out.)

Parsley WO front wm

I struggled with deciding on a size, because, after eating, 3-year-old Little Man is a straight up 21-inches-circumference rectangle–chest, waist, hips, all 21 inches.  I went with the size 4, but I think next time I’ll try a size 3.   I made absolutely no changes to this pattern–I used the recommended width of elastic with the appropriate length for LM; and the hem allowance had extra fabric that I just folded into the hem.  Allow me to explain.

First I have to mention, the entire time I was making these pants, I was thinking, “Wow, am I ever doing Rae proud with the dorkiest, most boring fabric on the planet!”  But as much as I wanted bold and fun, he needs some basic pants that will match most of the crazy bold, colorful shirts his closet is filled with.  After scouring the entirety of Joann Fabrics twice, I had to disappointingly settle on this camel-colored bottom-weight cotton.  I’m not excited about it, but it grew on me as I was working with it.  The next pair will have a bit more spunk and possibly an octopus ribbon tuxedo stripe.  But for now, the boring ones…

thegreencateye.com Parsley Pants

This size came up a but high (rise-wise) on him when pulled up all the way, which normally I don’t mind.  But for some reason, once he takes off running, the pants begin to ride up into a bit of a wedge.  Seen here:

parsley wedge

Then after he bends, kneels, and moves around some more, we ended up with saggy butt.  Seen here:

parsley saggy butt

I think this is all due to the rise being too high.  The seersucker pants I made that ended up with too high of a rise do this same sagging thing as his pants tend to sink to just above his hips.  And that’s regardless of how tight I make the elastic (rectangle boy strikes again!).  I think the smaller size could possibly fix all of these issues.

The hem length was a couple inches longer than I needed, so that just got folded up into the hem to be let down later in the fall.

perfect knee patch placement wm

I must give a shout-out to that those kneepad placement pattern marks!  When I sewed them on, they really looked too close to the inseam, but as you can see, they are spot on!  They also took a little longer to get placed than I wanted.  I didn’t bother to mark the placement on the fabric, but just laid the pattern over it and shifted the pads until they were in the right spot.  I think I’m going to actually cut out the kneepad circle placement marks on the pattern itself to make it easier to mark the fabric.  I’m truly just glad she puts those marks on her pattern in the first place.  (I’ve used a different pattern that doesn’t offer any placement marks for rear pockets, and nearly every pair I’ve seen online has crooked pockets!  These marks are a must on a pattern!  I’m so happy she took the time!)

Parsley WO Side 2 WM

She has also once again offered multiple tips and sewing guidelines that exceed what she must offer to be able to sew up the pattern.  That makes this a great pattern to also learn from.  As a self-taught sewist, I would’ve loved having all these little tips strewn throughout a pattern when I was first getting started and trying to figure things out.

Parsley Wo side

I haven’t given up on this pattern yet, and you will definitely be seeing more of it!

I also finally completed a Casual Lady Top from start to finish yesterday.  I will get some pics and a post up for that soon!

Thanks for looking! 🙂

Still more not-so-great pics for lack of time, but my hope is to possibly do some real posts for these later with Little Man actually wearing them…

Navy Grn Kid Pants WM

I gave much of my time to making some pants yesterday that I cut out a couple months ago, which were just gathering dust.  Though I had high hopes for these Basic Kid Pants, they turned out way too homemade for me to be comfortable allowing him to wear them in real public.  So they’ll likely be reserved for going to hang out with family or in the backyard.  Do you have a stash of homemade things you do this with, or is it just me?  They are navy twill with lime green contrast stitching throughout.  I need to work on my crummy topstitching skills, and remember that contrasting thread color is not always the way to go.  Fun, yes.  Professional-looking, not so much.

Yesterday, I also cut off those arm bands on the muscle tee I briefly showed you.  I didn’t bother with a seam ripper and literally cut just inside the seam allowance and hemmed the arm holes.  However, I forgot to take a pic.  The fit is still a little off, but I pulled out a similar store-bought shirt from last year, expecting it to be way too small.  I was very happily surprised to see that it not only stilll fit, but that the fit was quite similar in imperfections that I never noticed until trying to replicate the style.  So, I’m feeling a little better about the screwy fit for now, but I’ll probably try to tweak the pattern a little more later when he more desperately needs sleeveless tees.

Flashback Trio WM

What I did today was quite miniscule, but fulfilled the time commitment plus a little.  I cut out three short-sleeved flashback skinny tees from some of those thrifted shirts I showed you before.  While cutting, I also decided that the gray-blue was perfect for an “It’s Raining, It’s Pouring”-inspired shirt (the song I really wanted to use for the Sew-In-Tune Sew Along, but didn’t have appropriate supplies).  When I told LM this, he said he wanted rain drops all over it.  And people.  I said okay to the raindrops, of course, but no to the people.  I have some skill with painting (I was really into drawing and painting growing up and art classes in college, but majored in Religion), so I can handle some basic stuff.  But painting people on a t-shirt isn’t really something I want to take the time to do. 😉  But I did finish the purple one in the middle entirely except for paint–I’m still not sure what I’m going to put on that one, if anything.  I finished the shoulder seams on the other two and the sleeves on the gray-blue one.  I was doing it all factory-style until I ran out of the thread that coordinated with all of them…that I thought I had gobs of…but clearly didn’t.  Oops.

So my high motivation is beginning to dwindle slightly with the pants and muscle tee being such flops, but I’m thinking I’m going to purchase the new Parsley Pants pattern from Made-By-Rae that I’ve been DYING FOR ever since she mentioned that she was working on it with the awesome City Pants.  If the pattern fits LM as amazingly as the Flashback does, you will likely be seeing gobs fo them in a plethora of forms.  🙂  And despite my tiredness making this all seem very “blah”, I am actually FREAKING STOKED about this pattern!!!!

Last couple notes for anyone who actually reads all this nonsense rambling, I bought my URL today.  I’m officially thegreencateye.com now!  I was putting it off, just waiting until I had this whole blog thing figured out and everything perfected.  But just as I knew I would never start this blog if I waited until I had my brain together, I realized it may be a while before I get the hang of this WordPress host.  I still have so much to learn and figure out, so if things look really weird every now and then, you’ll know it’s just me experimenting.  Now, even though it’s only 9:30pm here, I think I’m going to bed.  Wow, I’m old.

Thanks for looking!  🙂

Mostly poor quality pics for you to see what I’ve been working on. Most was done after Little Man went to bed, so it was pretty dark in the kitchen where I was sewing. 🙂

Tyrone In Progress 1 WM

The beginnings of the Tyrone Shirt.  Cut from a shirt my brother-in-law gave me, using the Flashback Skinny Tee pattern.

Tyrone In Progress 2 WM

What was left.

Tyrone and Green Cut WM

I also cut the first test of the altered pattern to make a green muscle tee, which as you’ll see in a moment, still needs work…

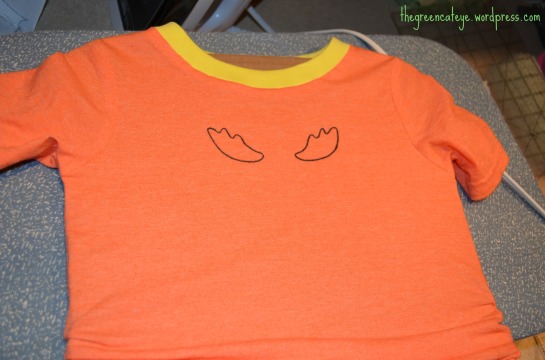
Tyrone Just Antlers WM

My plan was to just draw only the antler outlines for a subtle nod to The Backyardigans character, Tyrone, who is an orange moose with yellow antlers.  Who could’ve guessed that drawing that shape on a Halloween-orange shirt woud make for some creepy looking eyes?!  So…I had to add more:

Tyrone Full Outline WM

I went to bed satisfied with this.  But, when I woke up this morning, it looked too much like I just drew this onto a shirt.  Which, um…yeah, I know, is exactly what I did…  So I had to give myself even more work on what was supposed to be a quick 30-minute shirt.

Tyrone Drying WM

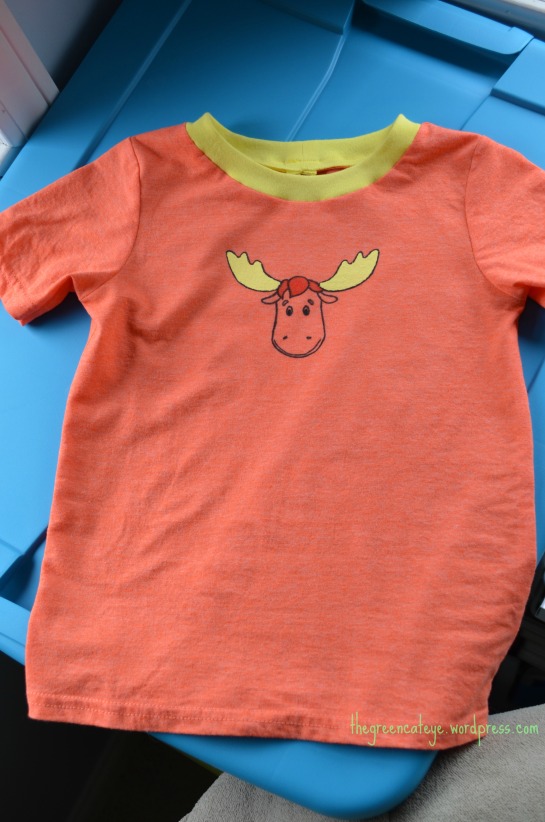
Behold, Tyrone on his drying board.  I even added the color for his hair.  I’m still not fully satisfied, but it’s better than creepy eyes.

thegreencateye.com Tyrone Shirt

thegreencateye.com Tyrone Shirt

And finished.  I might give you a better close-up later. 🙂

Muscle Tee Flop WM

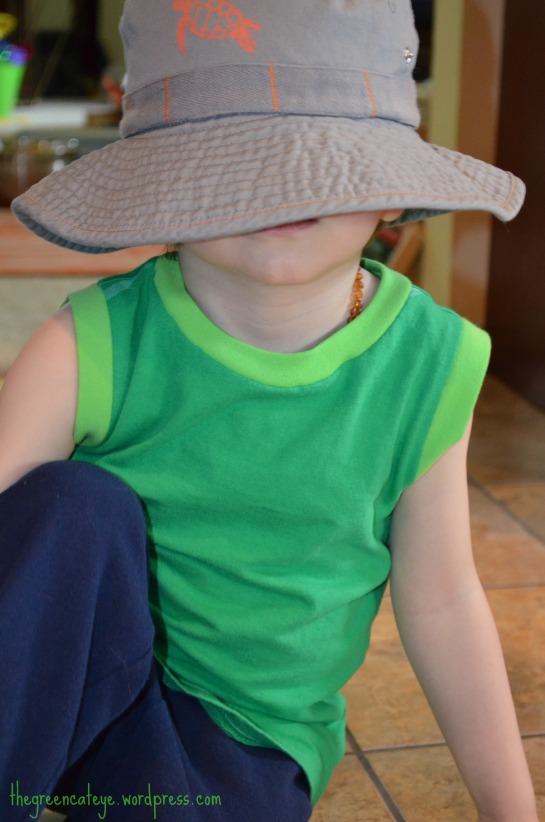
And as for the green muscle tee, I’m going to be working on that now that LM is asleep.  This pic doesn’t show it well, but the arm bands were not cut small enough, so they stick out like a futuristic uniform.  The neck also looks wonky here, but it’s only because of the way he’s sitting.  I’m thinking I’m just going to cut off the arm bands and hem the arm holes.  Hopefully it goes well, because I am not interested in yet another hang up!  And as for the weird hat thing–no, I didn’t pose him like that.  He’s pretending to be “The Mystery Lifeguard” from an episode of The Backyardigans (who would’ve guessed…), and Austin wears his hat low so the others don’t recognize him.  LM takes that as what you see above. Welcome to my world, people.  Welcome. to. my. world!  But he is wonderful and hilarious.  And refused to remove this shirt despite it’s flaws.

Thanks for looking!  Are any of you participating this week?  I was worried about regretting it at first, but I’m already finding a ginormous burst of motivation!  Now I have to get back to work while I have a few spare moments!  🙂

So, this is happening soon:

me-made-may'13

And I crazily have decided to sign up this time.  But don’t expect an overflow of reports or daily pics–I only pledged to wear three me-made garments a week for the duration of May.  Remember how I mentioned I don’t have many completed garments to show for my work due to cutting corners and good-enough sewing habits?  Yeah, I’m gonna be kicking myself for that next month.  Hopefully I’ll still be able to squeeze in some selfish sewing soon (like that Casual Lady Top I didn’t get to start yet!), because…

Spring KCW starts tomorrow! Full description here, but mainly–sew kids clothes for at least one hour each day for a week. I’ve seen lots of amazing things on other blogs for what some have accomplished, and I’m a little nervous to announce that I’m actually going to participate this time (look at me being such a joiner!)!  Though I have a rough plan of what I’m going to be making this week, I don’t yet have a blogging-about-it plan. But, rest assured, all the hard work will not go undocumented!

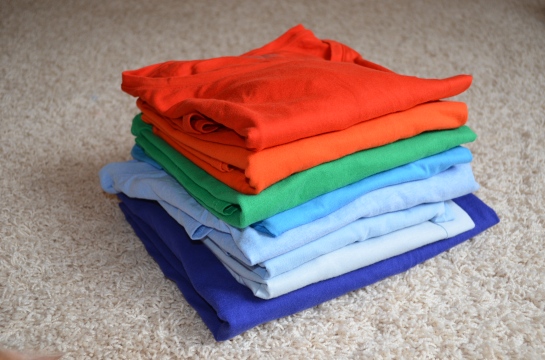
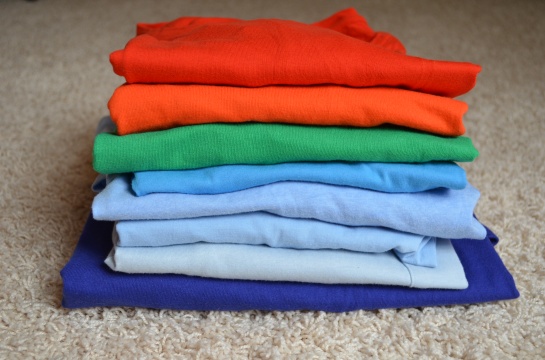
A few days ago, I made a trip to Goodwill (the American chain thrift store) to seek out some shirts and pants/shorts I could cut up and sew into clothes for Little Man. I was very picky this time, but I managed to find a few great things that I never could’ve found in a fabric store; and for a lower cost (both for my wallet and the environment!). Here are my rough plans for the week:  This stack of like-new condition tees willl become…

009

A few short-sleeved tees. After purging his closet last month of all the shirts and pants that he could no longer wear in public (since three-year-old boys don’t wear crop tops…), I realized just how little he really has to wear once the consistently hot weather hits. Luckily, here in Indiana, I can still get away with the very few he has, since we only get hot shorts weather for two days before it snows, then goes back into the 70s. Yes, really, that has been the past couple weeks around here–no joke! But summer is coming soon, and I need to be ready, so these thrifted tees will also become…

006

Muscle tees. They’re a summer must for him–he gets sweaty just sitting still in air conditioning, so I have to make sure fabrics are light and breathable and cover as little of him as is modestly possible.  Not to mention, he looks so cute in them!  I’m really happy I finally have an awesome, reliable t-shirt pattern that I know works for him and is incredibly adaptable.  I bet you can’t guess what pattern it is.  Try, I dare you.  Yeah, ok, so you know it’s the Flashback Skinny Tee.  I promise I’m not being paid for the incessant promotion of this pattern–it just really is that great! 😀

001

Shorts. And an unfinished pair of pants (more on that later…).  What I’m most stoked about is these shorts I got from the thrift store.  How awesome are those white/teal plaid shorts?!  They were actually plus size, so I know my pattern will fit, but even better–they’ve never even been worn!  The extra buttons baggie was still hanging from the inside tag.  Can you say “Score!”?!  I can’t wait to get them super-sized down for LM.  I like the muted tones in the brown plaid as well–there’s actually a bright orange stripe running in there, too, but it’s not very noticable here.  It’ll go great with the orange shirts I have planned.

004

An interesting (to me) sewing something about that last pinstripe pair–I’m pretty sure the original owner actially cut off pants and sewed them into shorts!  The inside has a clearly hand-stitched hem that doesn’t match the rest of these shorts’ guts.  They did a careful job of it too with making sure to only barely prick the white fabric for maximum invisibility.  They must not have felt like taking more time to fix the stitching when it popped.  It’s always lovely to find something that is not corporate made.  I love seeing (and knowing from a seamstress’ perspective) how much time and effort was put into such a simple garment.  It makes me wonder if they were hard for the original owner to give up; and how they would feel knowing someone actually paid money for something that contained their own hard sewing work.  Anyhow, I love this fabric, and I think it’ll look beachy-cute on LM as shorts (but then again, we all know how that thought turned out last time…).

I got a few other things as well, but I’ll save those for later when I actually intend to use them.  Except this last gem:

011

I found this one on the $1.99 t-shirt wall (original price of $20 on sale).  If you don’t watch The Office, sorry this shirt will make no sense to you, but my husband is obsessed.  We even have a bobble-head collection that I gave him for his thirtieth birthday at his The Office-themed surprise birthday party where everyone was dressed up as a designated character from the show.  I bought this one because of my husband.  I think the print is still too wide to fit on anything for LM right now, but maybe in a couple years it will work.  Unless I find a better use before then.  Needless to say, my husband was quite pleased!

So, are you participating in Me-Made May ’13 or KCW?  Do you buy all new fabrics for sewing, or are you a thrift store scavenger?  I’m actually quite new to the thrift store scene, but I’ve been loving the savings and unique fabrics.  Which is ironic, since just a couple years ago, I found the idea of buying used clothes to be quite gross…how the tables have turned! 😀

And, wow!  I used a lot of exclamation points in this post!  I guess I’m more excited for this week than I thought! And for good measure–!!!!

Thanks for looking!  🙂

To those who see this shirt, it probably seems like just an ordinary shirt.  But for me, it is a MILESTONE!  Allow me to explain…

thegreencateye.com The "Don't Be Lazy!" Shirt

No, I’m not really that pink, but I was the only one available to take my picture. I figured you might be nosy like me and be annoyed that you had no clue what I look like. 😉

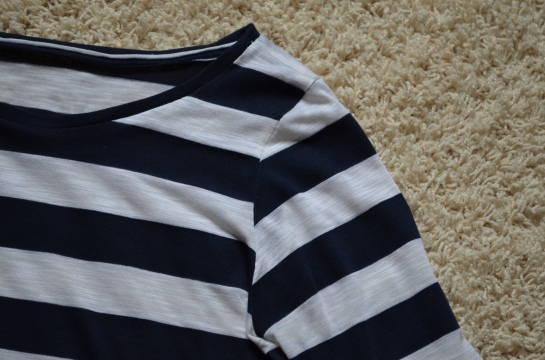
I received a hand-me-down shirt from my sister, and it was like the Goldilocks of shirts–just right!  I’ve never done a rub-off/tracing of an existing garment to make a pattern. Though nervous, I knew I was going to want to master this skill eventually, so no better time than the present!  I had the perfect 4-year-old fabric in my stash that was nearly identical in drape and weight to the original shirt.  I’m pretty sure my fabric is rayon, but it’s extremely silky soft and slub-knit-ish and breathable.  (That’s the original on the left in all it’s pilly glory, and my navy/cream stripe me-made copy on the right.)

thegreencateye.com The "Don't Be Lazy!" Shirt

I am typically a very lazy, cut-all-corners, good-enough, make-due, kind of sewist.  I also have very few wearable garments to show for all my sewing time.  Hmmm…methinks there may be a connection there. I have been torturing myself over the past year to take my time and enjoy the process of making something for myself. And with 3-year-old Little Man underfoot now, I’ve had to really get used to not staying up until 2am to finish something in one sitting.  It hasn’t been easy, but I’m getting there.  I’m also actually learning things!  Who would’ve thunk it?!

thegreencateye.com The "Don't Be Lazy!" Shirt

With truly every step of the process of creating this shirt, I had to remind myself, “Ashley, don’t be lazy!”  Though careful, I had a hard time getting the original shirt to lay really flat without stretching it.  The overall fit is mildly smaller, but I think it’s more flattering now.  I omitted the pocket–the original never lays flat and is awkward. I also made the collar skinnier, which I prefer from another fave shirt.

Collar Band detail

I planned to replicate the sleeve details too, but after carefully stitching on the tabs, the sleeves weren’t going to fold/lay the same way. So as I pondered whether to just make this a cap-sleeved shirt, I once again decided to not be lazy.  I sat and carefully took out the seams of the tabs–so carefully in fact that you can’t even tell they were ever there!  (Just don’t ask to see those shredded tabs…)

DLB Orig Slv detail

Despite my current skill set, I have never really done a normal hem on knit fabric.  I was extremely nervous to even attempt it, but I knew it was another technique I was going to want to master someday, and remember I was trying not to be lazy.  So, I did it.  And, holy moly, it actually turned out pretty darn good for a first attempt!

Sleeve Hem detail

I also managed to get those stripes matched up!  The sides were on purpose, the sleeves…well, happy accident.  I still hadn’t looked up how to match those, and it was the one time during the entire making of this shirt that I decided to wing it.  Not perfect, but I’m very happy it worked out and now know where to match point sleeves when cutting.

Slv Stripe Match

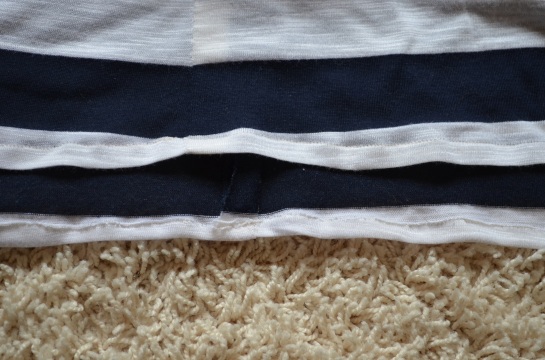
The insides are raw, but none are visible from the outside–I haven’t braved my serger yet.  That bottom hem was already a bit shorter than I prefer, so I didn’t have much to work with.  Yes, I do see that it’s a little wavy and crooked and looks like I temporarily lost the gift of sight while sewing it, but did I mention it was my first time hemming a knit?

Unfinished insides

Overall, I am very happy with my milestone of a shirt.  The first time for many things, but most of all, a first time for not being lazy!  I’m so glad I took the time, because I’m pretty sure I have my first sloper!

I’m also linking this up for Rae’s Spring Top Sewalong.  Hopefully I’ll get my Casual Lady top finished tonight so I can share it with you this week.

Have you had to learn to be a more patient sewist since having kids (or even in general)? Or ever traced off an existing garment?

Also linking up here this week:


I made this a few weeks ago, but wanted to share more about it here.

thegreencateye.com Jack Frost Hoodie and Pants

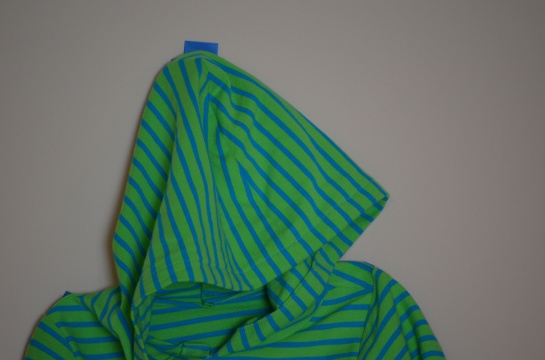
I typically try to stick to 100% cotton fibers (or at least natural) on Little Man.  I must admit this outfit is anything but natural fibers.  When I went to Joann to find some cotton interlock knit, I happened to spot this perfect-for-a-hoodie mostly-polyester knit fabric.  I believe it’s called ponte knit??  (Please note previous statement about fabrics I buy–I clearly am new to this realm of fabric!)  We’ve had a couple store-bought hooded shirts made of very similar fabric that have worked great on him in the past, so I immediately asked LM which color of this was his favorite. This purchase re-opened the door for the hoodie I thought I didn’t want to bother with.  It quickly became the first project I wanted to tackle for his spring wardobe!

UPDATE: I went back for some more of this fabric in purple–which you’ll be seeing soon!–and it’s actually 95% cotton and 5% spandex! I was very happy about this discovery and don’t know how I missed it before. And it’s pique knit. Mommy brain strikes again…

thegreencateye.com Jack Frost Hoodie

After seeing Rae’s hoodie tutorial, I realized adding a hood to a t-shirt pattern would be quite simple.  I hadn’t used her flashback skinny tee pattern yet (though you’ve seen plenty of it here by now!), and was stoked to finally put it to use.  I traced and measured around a hooded zip-up that fits him well to get the dimensions and shapes for the hood, cuffs, a waistband, and pouch pocket.  I wanted it to be similar to the style that we’ve loved on him in the past, and like all young kids, LM loves pockets!

Pouch Detail Jack Frost Hoodie

I used some green cotton interlock from Joann for the sleeves and waistband.

Side Seam Detail Jack Frost Hoodie

This is the only photo that shows the truest coloring of the shirt. Even though all the pics were taken at the same time.

I’ve never done stripes matching before, but I knew I wanted to at least try to get it matched up a little.  I did my best to remember the matching tips I’d read ages ago knowing that someday I would utilize what I had been wasting my time reading. I used a million pins, which was exhausting for me, since I try to avoid them for time saving sake.  I figured I’d either spend my time pinning first or ripping out the seam 76 times to redo it–I chose pinning and am so glad I did!

Hood Detail Jack Frost Hoodie

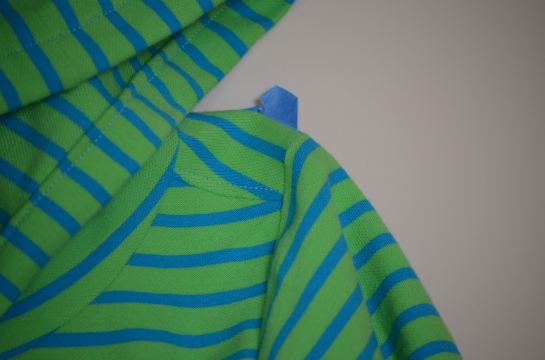
I did a french seam on the hood to hide the raw edges.  It was extremely tedious work but luckily paid off.  The side seams matched nearly perfectly with a few stripes being slightly off, but it wasn’t bad enough to be worth my time to fix.  It was no more flawed than any ready-to-wear shirt I would’ve paid for.  I thought the way I cut the sleeves might make them match the body, but I really had no idea if it was possible.  I now know that I just used the wrong point to match for cutting.  I also intentionally made the pouch pocket not match, so it wouldn’t blend in.  I can proudly say there was much happy dancing in my kitchen during the making of this shirt! 😀

Shoulder Detail Jack Frost Hoodie

When it was done, LM realized there was a hood, and was very excited to say, “Like Jack Frost?!”  After seeing Rise of the Guardians just days before, he loved the idea that he was like Jack Frost in that movie–he’s portrayed as a teenager-y kid who wears…you guessed it–a hoodie!  So now he calls it his Jack Frost Hoodie and is always happy to put it on.

Another project I was excited for from that shopping trip was this pair of Kid Pants I was finally testing using woven fabric.  At Hancock Fabric, I spotted some amazing turquoise linen-look rayon fabric on a clearance rack.  The price was still higher than I wanted to pay despite being on sale (as in $10 for one yard), and it was rayon, which I try to avoid after reading how they make it, so I left it there.  I know you’re wondering, “But Ashley, if you left it there, however did you manage to make the vibrant pants I see before my eyes??”  It just so happens that on the other side of the store in the remnants bin was one and half yards of it for…wait for it….$2.50!  These pants don’t even use a yard of fabric, so I still have some left over!  Can you say “bargain”?!

thegreencateye.com Turquoise Pants

They were only practice, but they are perfect on him.  After my 2 previous version in knit fabric, I just made the pattern 3/8″ larger on both sides of the leg seams and added 3/4″ to the top.  I also used the patch pockets pattern Dana offers for these pants.  These are more for just at home or visiting my sister for a play date, but I would be okay with taking him out in them if he wanted.  They’re super soft and comfy.

Front Pocket Detail Turquoise Pants

I linked the hoodie up at Alida Makes for her Calling All Kids series and for the Sew-vivor Emerald Challenge.  It’s not emerald, but the actual contestants said since they struggled to find any emerald (didn’t fabric stores get the Pantone memo?!), they were told any green would do.  I wasn’t randomly selected to win or featured in any way, but just participating was enough for me.

Thanks for looking!!  More coming soon!  🙂

This post is now somewhat ancient in blogosphere time, but since I already shared the dorky pants, I figured I’d let you know about  the rest of it.  Behold what was my entry into the Sew In Tune sewalong:

thegreencateye.com Gobble It Up Outfit

I wanted to make Little Man an “It’s Raining, It’s Pouring”-inspired outfit (weirdly, he loooooves nursery rhymes, and it’s his fave), but I put it off for so long that I didn’t have time to go out and buy more supplies.  I was so on the fence about participating, since I’ve never participated in any of the amazing sewalongs online–I don’t think I’ve mentioned how paranoid I already am to be putting myself out here like this.  It stupidly really stresses me out…even though none of you even know me, and I could just delete it all away with the click of a button!  Back to the outfit…

thegreencateye.com squid shirt

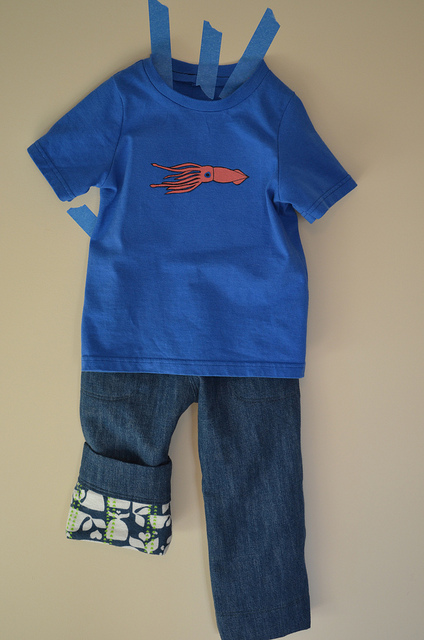
Clearly this isn’t inspired by LM’s fave nursery rhyme.  On a whim the day before it had to be submitted, I realized we’ve been listening to Jim Arnosky sing “Gobble It Up” on repeat for the past three weeks!  Really no joke–I was waking up in the middle of the night with that song stuck in my head!  It’s actually a book themed around the food chain that comes with a CD that we got from the library.  I took one section of the book about a great whale diving to the bottom of the sea, and “pick a fight with biggest kid, and gobble you up a giant squid!”  It’s weird but catchy.

thegreencateye.com Squid Shirt Detail

The shirt was a thrift store find.  I used MADE’s free Basic Tee pattern.  It fits skinny LM a little big around his torso, but at least it fits!  The original owner snagged on something to create a small hole, but it worked out for us, because the shirt was in excellent condition.  I made a freezer paper stencil to make the squid (NOT EASY with ten friggin’ tentacles to cut around!!!), and quick and dirty painted and traced it with a fabric marker.  It’s not my best work, but I was in a mad dash to get pics taken and uploaded before the deadline.

Gobble it up lining detail 1

The pants I didn’t even take extra pics of because I’m rather embarrassed for anyone to see them in the first place, so you’ll have to take my word on them…I modified the Nowhere Man Pants pattern (I don’t want to link to them because my version is really that bad…) to have a skinnier leg and a knit waistband.  I cut up a pair of thrift store plus-size women’s shorts to create these.  They really fit okay, but the denim is just a little weird, and the waistline sits too low in the back.  I could probably alter the pattern and it would work great, but this version was a completely and totally embarrassing dud.  The lining fabric I wasted on them was some awesome whale flannel from Joann.

I hope you don’t judge me too harshly by this outfit…I can really do better. :/

Thanks for looking!  Hopefully you’ll still come back after seeing this. 😉

thegreencateye.com Seersucker Pants

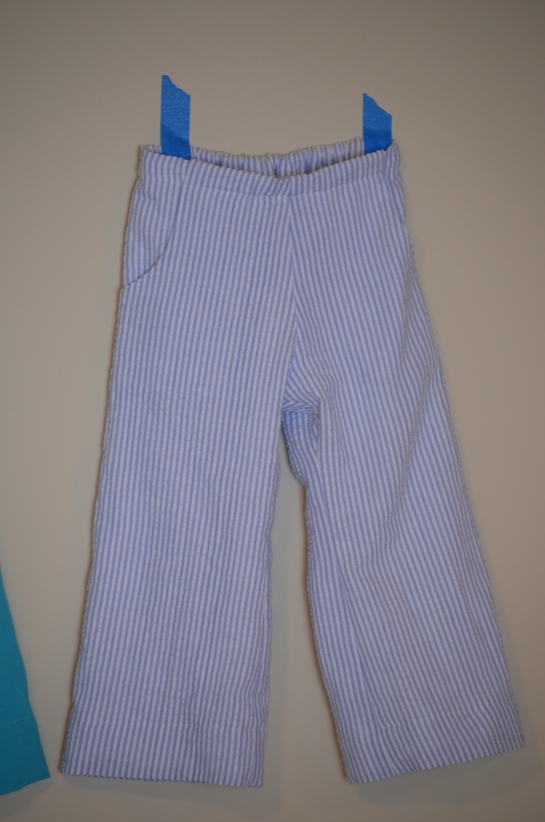
Actually, I guess these pants stopped being “basic” once I started drafting changes to the pattern.  I started with Dana’s Kid Pants pattern (it’s free, it’s great, it’s ridiculously adaptable and easy to grade up/down–check it out!).  After testing the as-is pattern with some knit fabric (which could be used as pajama pants regardless of the outcome), I knew they needed to be a bit bigger.  After a horrible alteration that made the rise too high and the hips too wide, I realized that hasty and uncareful grading wastes so much more time than it saves!  So back to the drawing board again,  I tested one last time, and they worked out great.  More on that evolution later, but for now, on to the seersucker (which I totally copied from Dana–only hers are better with the black)!

Inseam Pockets Detail Seersucker Pants

I wanted these to look a little cleaner, so I altered it to move the pockets to the inside (that’s “inseam pockets,” right??), and I added a white jersey knit lining.  More additions: back patch pockets that are barely visible with this fabric, flat-front, and a weird-Ashley-cheater-method of an adjustable waistband.  I’ve done the inseam pockets adjustment thing before on some other pants, so that was cake.

Back Pocket Detail Seersucker Pants

The back pockets look better in person and on his bum, I promise.

Even though I know how to do an adjustable waistband, I really didn’t feel like messing with buttonholes in the fabric to make an adjustable waist possible. Little Man is not a fan of adjustable waistbands as it is, so I was pushing my luck on these pants in the first place.  I wanted to conceal those buttons from his skin as much as possible–I never can understand how having a button smashing into your sides could be comfortable anyhow.  I didn’t take pics of my process, so hopefully you can see from the finished product. This way allows me to tuck the button in a little as well.

Adjustable Waist Detail 1 Seersucker Pants Adjustable Waist Detail 2  Seersucker Pants Adjustable Waist Detail 3 Seersucker Pants

The unfortunate part of these pants is that my test pants used a wider elastic…I didn’t account for that when making these pants (face-palm).  This causes them to sag  and shift downward to where pants are supposed to sit on him.  But they still fit pretty well, and I made the hem deep enough that I can let it down if he grows too tall before the waist stops fitting.  Also, the fabric was a light blue pinstripe seersucker from Joann that I thought looked great–light and beachy, hello!–but after putting them on him, my husband’s first words were, “They kinda look like pajama pants.”  Now that’s all I see.  I think if dressed up enough, I will be able to get past it.  But they do look like pajama pants.  They will still get worn!! LM loves them!

thegreencateye.com Silly Goose Outfit

I swear it was actally really bright when I took this pic!

Last thing, I’m linking this and the Silly Goose Hooded Henley (sans goose) into The Sew-Off Kids Clothes Week and Sew-vivor Buttons week.  I know these don’t utilize gobs of buttons, but both of these were on my to-sew for spring list and happened to fit the themes.  Yay for me and saving time! 😀

Thanks for looking!  I’ve still got more to share!

Find pinnable images on the blog board of my Pinterest page here!

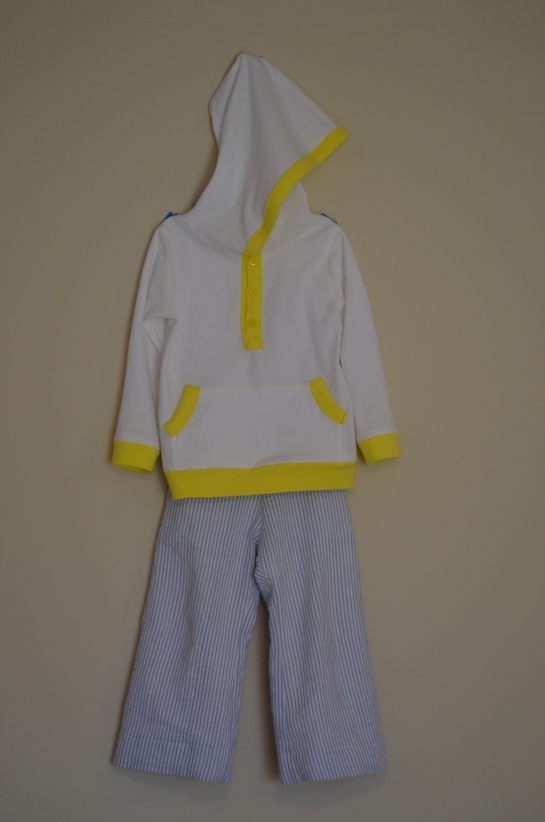
For as long as I can remember, Little Man has had an obsession with birds and fish.  Shortly before the holidays last year, we discovered the “Suzy Goose” series by Petr Horacek.  We both quickly fell in love with the goofy and oblivious Suzy Goose.  This series then led to the request for more goose books from the library (not unusual…we tend to have the max amount of books allowed for check-out at one time, and they also tend to feature one certain subject/animal.)  The kid loves books.  After cycling through many, many goose books, and reading them over and over and over, I had the brilliant idea to make my 3-year-old Little Man a goose shirt.  Not one that would be overkill, but would be subtle (see the last post where I mention this idea).  After seeing Rae’s tuturial for a hooded henley, I had the idea solidly mapped in my mind, but decided to add even a little more spunk to mine with a contrasting waistband and a front pouch.

thegreencateye.com Silly Goose Hooded Henley

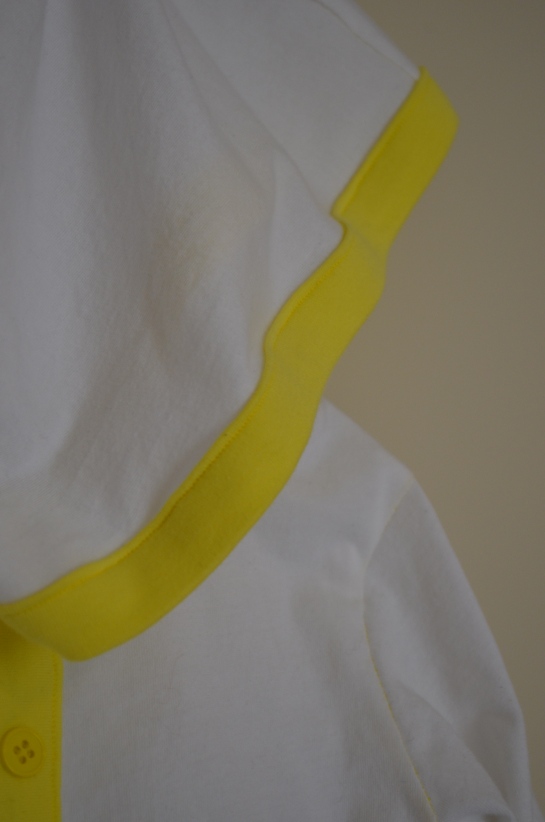
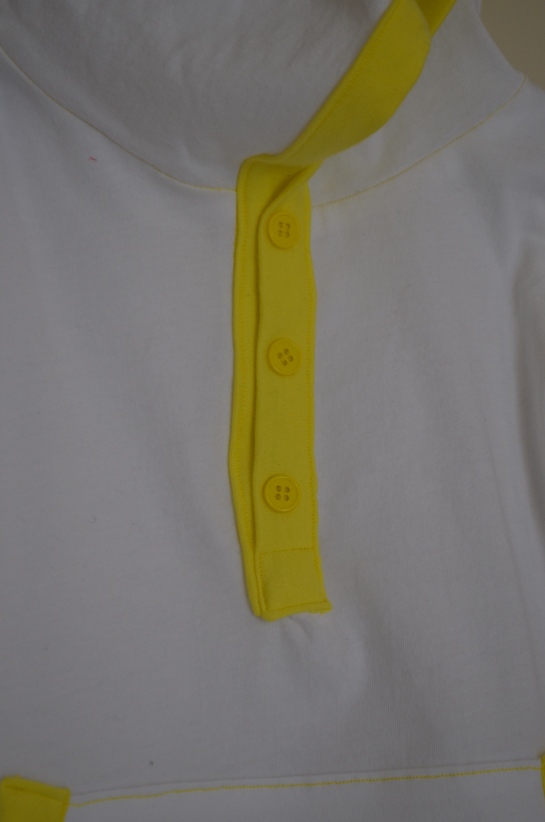
I took slow and careful time to put this shirt together.  I picked up a few new skills along the way too.  I’ve never added trim to a hood that extends into a placket.  I’ve never made a knit placket (and will probably do things a little differently next time).  I’ve never added a binding to pouch pockets or sewn buttons through stretchy layers.  I learned quite a bit from this shirt, and I’m honestly amazed that it turned out as well as it did.  (And yes, I do see those flaws…I’ll get to them in a minute…)

Hood Trim Detail Silly Goose Hooded Henley

I used a plain white cotton jersey knit from Hancock for the main fabric, and a pastely-neon yellow interlock knit for the bindings and cuffs and waistband (the same as the megaphone shirt in my last post–again, it doesn’t photograph accurately…also not when it’s an overcast day outside.).  He loves yellow.  I know orange would make more sense for a goose shirt’s trimmings, but I couldn’t find any locally.  I don’t want to start an online ordering obsession…It wouldn’t end well. 😉  The buttons are a bit more canary yellow than neon, but they’re about as close as I could get.

Pouch Detail Silly Goose Hooded Henley

I drafted the hood, pouch pocket, cuffs, and waistband from a zip-up that fits him well. The base of the shirt is a flashback skinny tee in a size 5T for my three-year-old(have a mentioned my love for this pattern?! Seriously, buy it!).  Yeah, he’s a biggin’.  Not fat–he’s actually quite skinny.  He’s just extremely tall.  This shirt pattern has been a God-send!

Placket Detail Silly Goose Hooded Henley

I am always uber careful to avoid stretching knits when they aren’t supposed to be stretching.  But somehow, my stupid mommy brain forgot that also applied to the placket!  When I was fidgeting with getting the two layers neatly arranged for those buttons, it looked great and perfectly aligned!  Then it sat for a few minutes post-buttons-being-sewn-on.  Oops.  It shrank back to its original size and now looks crooked and the buttons misplaced.  Did I mention I learned a lot from this shirt??  Add that to the list. Rae says to put interfacing in the placket area to make it stronger for buttons or snaps, but since I was sewing the buttons through all layers without buttonholes, I skipped it.  I may go back and fix the buttons later, but the more likely outcome is that I stop caring and do better next time.  Cuz there will definitely be a next time.  I also don’t like that little pucker under the placket where it was overlapped.  With the method used in the tutorial, this seems to be inevitable (unless I misunderstood how to do it…which is quite possible in my naptime/distracted rush of sewing).  That’s another reason I think I will change it up a bit next time.

Cuff and Waistband Detail Silly Goose Hooded Henley

I love the contrast stitching on the pouch and throughout the shirt.  Since the shirt is white, the stitch lines around the armholes and such that get stretched give little peeks of the yellow thread as well.

Did you notice what’s missing?  Yeah.  That goose.  The goose I was so excited about.  After I finished sewing it and explained that I was planning to paint a small goose on it next to the placket, he told me he didn’t want me to.  Yes, I was stunned.  I asked him at least 132 times if he was sure, and he was adamant that no goose was to be on this shirt.  He said he liked it and would wear it, but no goose.  Okay.  Less work for me, I suppose.  If he ever changes his mind, you’ll be seeing that goose!

thegreencateye.com Silly Goose Outfit

There is a pair of pants I planned to pair with this shirt, but to keep things a quick(er) read for you (yeah, I know I’m wordy…I just can’t help myself), I’ll save it for my next post.  I’m also going to link this outfit up to the Sew-vivor buttons week sewalong and The Sew-Off Kids’ Clothes week (no, I’m not auditioning!).

Thanks for looking!  I’ve got more in the works! 🙂

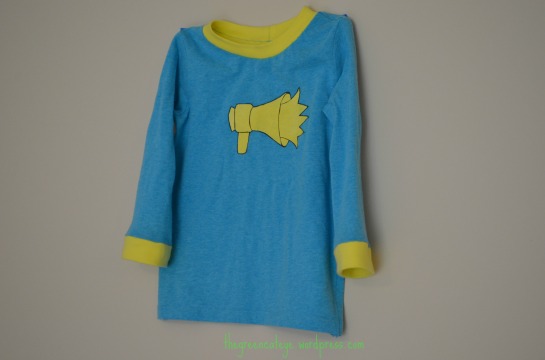
In elementary school art class, we were given an assignment to write a small essay about an artist and do a project inspired by that artist’s work.  My fourth grade creative brain decided on Andy Warhol.  I love the combination of bold colors and simple imagery that altogether become something amazing.  I still love bold color (you can expect to see plenty more around here!) and I especially love creating imagery that is simple but means something.

thegreencateye.com Megaphone Shirt

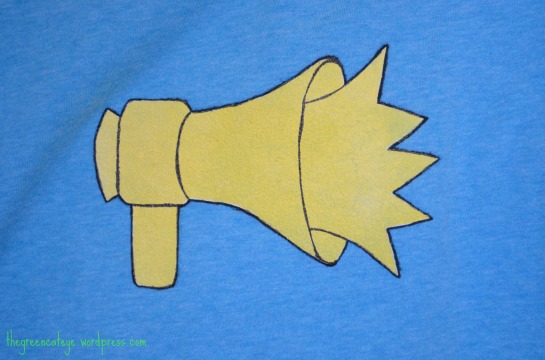
When I was planning 3-year-old Little Man’s spring/summer wardrobe, I knew I wanted some flashback skinny tees (hi, who wouldn’t?? The pattern is awesome!), but I wasn’t sure what I wanted on them.  LM isn’t too picky about his clothes yet, but he definitely prefers the ones with his current obsessive interest incorporated somehow.  I don’t  like plastering my kid with characters and such, but I do like to give a subtle nod to what he loves.  Fun for him, exciting for me that he wants to wear what I make for him.  When perusing a new (to me) fabric site, I came across a DC Shoes knit with tiny megaphones all over it.  The colorways weren’t really our style, so I decided against it. Until I had a lightbulb moment of inspiration and realized, “Duh, Ashley!  You can totally paint that onto a shirt!”  So I did. 😀

thegreencateye.com megaphone shirt detail

Why the megaphone fascination in the first place, you ask?  LM watches a few episodes of the PBS show Super Why! and has his faves.  His current one is technically about Cinderella, but he takes away the part where Little Red calls into a megaphone, “Little Boy Blue, come blow your horn! I want to finish playing our song!”  I know this line easily by heart not because I’ve seen the episode too many times, but because he will shout it from various rooms while incorporating it into his very imaginative play (please tell me I’m not the only one!).  He’s always asking for a megaphone!

Thus, this shirt was born.  I used a freezer paper stencil for sponging the paint on and a fabric marker to trace it and add the details.  It’s very likely to crack after a while with so much paint, but I like a vintagey look, and LM loves his new megaphone tee!  By the way, that tee was originally a thrift store shirt that I hacked apart at the seams and used the flashback pattern to cut a new shirt out of the fabric.  The yellow trim is actually somewhat pastel neon yellow interlock from Joann that is impossible to capture on camera (and is also sparkly on the underside, an accidental purchase that turned out okay, but that’s a story for another day…).  Total cost–maybe $3.50 at the most.  Can you say bargain?!

thegreencateye.com Megaphone Tee

Oh yeah, I’m adding this shirt into the Project Run and Play sewalong for their inspired-by-art week this week.  My brain was psychically connected and knew there would be such a week when I was doing my planning, cuz I’m amazing like that. Either that, or it was a coincidence.  But I’m not saying which one. 😉  Anyhow, to do so, I’m begrudgingly combining his shirt with some pants I made for the Sew In Tune sewalong a few weeks ago.  I don’t even want to talk about these unwearble pants (okay, maybe later), let alone promote them even more, but I felt the need to “complete the look.”  So, here they are.  In all their dorky glory…

thegreencateye.com Pop Art Outfit

Thanks for looking!  And sorry for any goofiness here on the brand spanking new blog…I’m still figuring out how to use this thing! 🙂